It's July. You're hauling a full load through southern Ontario at 35°C and your A/C decides to stop working. No cold air — just warm air blowing from the vents.
This isn't just a comfort problem. Heat impairs reaction time, judgment, and concentration — exactly what you don't want behind the wheel of a loaded Class 8 truck. In Canada, most provinces treat driver heat exposure as a workplace safety issue under occupational health legislation.
The good news: a semi truck A/C system that stops blowing cold almost always comes down to one of five causes. Most of them can be diagnosed roadside or in a parking lot with basic tools. Here's how to work through each one.

A truck cab can reach dangerous temperatures in summer heat when the A/C system fails. The cause is almost always one of five components.
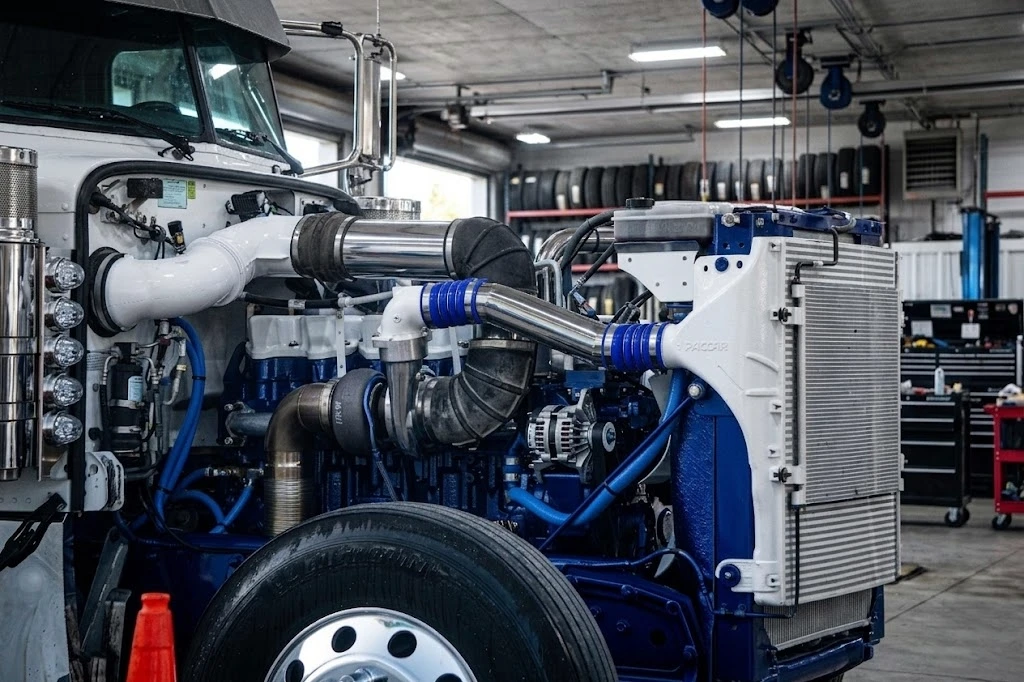
How a Semi Truck A/C System Works
The A/C system moves heat from inside the cab to outside the truck. It does this by cycling refrigerant (R-134a in most trucks) through four main components:
- Compressor — pressurizes the refrigerant, turning it from a low-pressure gas into a high-pressure gas. Driven by a belt off the engine.
- Condenser — sits at the front of the truck, looks like a small radiator. Hot high-pressure refrigerant passes through it and loses heat to outside air.
- Receiver-dryer — filters moisture and debris from the refrigerant before it enters the evaporator. A consumable part that needs replacement every few years.
- Evaporator — sits inside the cab behind the dash. Refrigerant expands and drops in temperature here, absorbing heat from cabin air. This is where the cold air comes from.
When any one of these four components fails — or when refrigerant leaks out of the lines connecting them — the system stops producing cold air. Here's how to identify which one is the problem.
1 Low Refrigerant (Leak in the System)
This is the most common cause, and the first thing to check. The A/C system is sealed — it doesn't consume refrigerant the way an engine consumes oil. If your refrigerant level is low, there's a leak somewhere.
R-134a leaks are slow in most cases. A small leak at a fitting or O-ring might take a season before the refrigerant drops low enough to affect cooling. A cracked line or a failed compressor seal can drain the system in days.
How to diagnose it
The most reliable way is a manifold gauge set. With the engine running and A/C on, connect to the low and high service ports. On a healthy system, you should see roughly 25–45 psi on the low side and 200–350 psi on the high side (varies by ambient temp). Both readings low means you've lost refrigerant.
Without gauges, look for oily residue around fittings, hose connections, and the back of the compressor — refrigerant oil migrates to leak points and leaves a visible stain. UV dye kits can make small leaks easier to spot.
Don't just top up the refrigerant if you find a low charge. Find and fix the leak first, or you'll be back in the same spot next month. Common leak points: O-rings at fittings, Schrader valves on the service ports, and the compressor shaft seal.

A manifold gauge set is the fastest way to confirm a refrigerant charge issue. Both low and high side readings below spec indicate a leak.
2 Failed A/C Compressor
The compressor is the heart of the system. When it fails, nothing works — no pressure means no cooling, regardless of how much refrigerant is in the lines.
Semi truck compressors can fail in several ways. The most common: the clutch fails to engage. The clutch is an electromagnetic switch that connects the compressor to the engine belt only when A/C is on. When it burns out or the electromagnet fails, the compressor just spins freely without doing anything.
The compressor itself can also seize internally — usually due to low oil, refrigerant contamination, or just age and wear past 500,000 km. A seized compressor often throws metal debris into the entire system, which means you'll need to flush the lines and replace the receiver-dryer at the same time.
How to diagnose it
Start with a visual check: with the engine running and A/C on, look at the compressor. The outer ring (belt pulley) should be spinning continuously. The inner clutch plate should also be spinning — if only the outer ring is moving and there's a gap between it and the inner plate, the clutch isn't engaging.
Check the compressor clutch fuse and relay before condemning the compressor itself. A blown fuse is a $2 fix. Also check the low-pressure cutout switch — if system pressure is too low (from a refrigerant leak), it intentionally disengages the compressor to prevent damage.

The A/C compressor clutch engages when A/C is switched on. If only the outer pulley spins and the inner plate doesn't, the clutch has failed.
Need an A/C compressor?
We stock compressors for Freightliner, Kenworth, Peterbilt, Volvo, Mack, International and more.
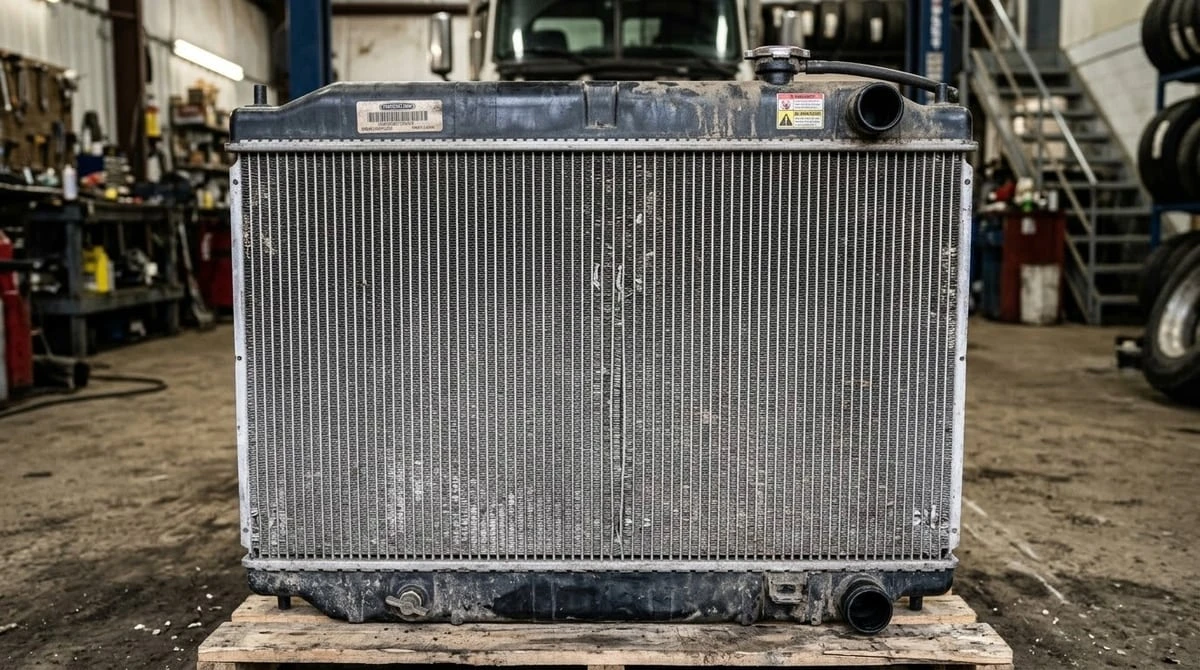
3 Clogged or Damaged Condenser
The condenser sits at the front of the truck, usually mounted just in front of the radiator or charge air cooler. It's exposed to everything the road throws at it — bugs, road debris, mud, salt. Over time, the fins get clogged and the core can get physically damaged from road debris.
A blocked condenser can't release heat efficiently. The high-side pressure climbs well above normal, the refrigerant doesn't cool down properly between passes, and what comes out of the evaporator is barely cool at all. You may also notice the high-pressure cutout switch tripping and the A/C cycling on and off rapidly.
How to diagnose it
Look at the condenser from the front of the truck. Shine a light through it — you should be able to see light clearly through the fins. If it's matted with debris, that's your problem.
A clogged condenser can often be cleaned with compressed air or a gentle rinse from inside out (to avoid pushing debris deeper in). A bent or holed core needs to be replaced. Check for oily residue on the condenser face as well — that indicates a refrigerant leak within the condenser itself.

The condenser fins should be clean and open. Debris blockage raises high-side pressure and kills A/C performance even with a full refrigerant charge.
4 Saturated Receiver-Dryer
The receiver-dryer (also called an accumulator on some systems) is a small cylindrical canister that filters moisture and contaminants from the refrigerant. It contains a desiccant — silica-gel-type material — that absorbs water vapor.
The problem: that desiccant has a limited capacity. Once it's saturated, it can no longer absorb moisture. Water in the refrigerant system turns into ice crystals at the expansion valve, restricting or completely blocking refrigerant flow. You get warm air or intermittent cooling that works for a while then stops.
A saturated dryer is also a sign that the system has been opened or has a recurring leak. Every time the system is opened to air, moisture gets in.
How to diagnose it
The receiver-dryer has a sight glass on most systems. If you see bubbles or foam in the sight glass with the A/C running, the system is low on refrigerant or the dryer is failing. Frosting on the dryer body or on the lines near the expansion valve points to a moisture blockage.
The receiver-dryer should be replaced any time the system is opened — during a compressor swap, a condenser replacement, or any repair involving cutting into the refrigerant lines. It's an inexpensive part and skipping it is false economy. Browse our semi truck A/C dryers.

The receiver-dryer is a wear item. Replace it every 2–3 years or any time the A/C system is opened for repairs.
5 Leaking or Failing Evaporator Core
The evaporator core is inside the cab, typically behind the dashboard or in the overhead bunk HVAC unit. It's the component that actually produces cold air — refrigerant expands and absorbs cabin heat as it passes through the evaporator fins.
Evaporator failures are less common than the other four causes, but they're the most labour-intensive to fix because of how buried the component is. Leaks develop from corrosion, vibration cracks, or physical damage to the fins.
How to diagnose it
Signs of an evaporator problem include: sweet or chemical smell from the vents (refrigerant or refrigerant oil entering the airstream), moisture or oil residue on the cabin floor below the HVAC unit, and a system that holds pressure at the service ports but still doesn't cool properly.
Evaporator leaks are often confirmed using a leak detector probe inserted into the cabin air intake with the blower running, or by finding refrigerant oil residue on the evaporator drain tube outlet. Browse our semi truck evaporators.
Quick Diagnosis Guide
Use this table to narrow down the cause before calling a shop or pulling parts:
| Symptom | Most Likely Cause | First Check |
|---|---|---|
| Warm air, both gauge readings low | Low refrigerant / leak | Inspect fittings for oily residue |
| Compressor clutch not spinning | Compressor / clutch failure | Check fuse, relay, low-pressure switch |
| High-side pressure very high, A/C cycling on/off | Blocked condenser | Inspect condenser fins for debris |
| Intermittent cooling that stops after a few minutes | Saturated receiver-dryer / ice blockage | Check sight glass, look for frost on expansion valve |
| Sweet smell from vents, normal gauge pressures | Evaporator leak | Check evaporator drain for oily residue |
What Does It Cost to Fix?
Here's a realistic cost range for each repair in Canada (parts + labour at a commercial truck shop):
- Refrigerant recharge (R-134a): $150–$300 CAD — includes leak check
- A/C compressor replacement: $700–$1,400 CAD — includes new dryer and system flush
- Condenser replacement: $400–$900 CAD — straightforward job
- Receiver-dryer replacement: $150–$350 CAD — cheap part, easy access on most trucks
- Evaporator replacement: $1,200–$2,500 CAD — high labour due to dash disassembly
Buying your own parts and bringing them to a shop cuts the parts markup significantly. Our A/C compressor catalog covers Freightliner, Kenworth, Peterbilt, Volvo, Mack, International, and Western Star — same OEM fit, no dealer markup.
How to Prevent A/C Failures
Most semi truck A/C failures are preventable with basic annual maintenance:
- Check refrigerant charge and pressure every spring before hot weather hits
- Replace the receiver-dryer every 2–3 years, not just when the system is opened
- Clean the condenser fins at every scheduled PM — takes 10 minutes with compressed air
- Inspect A/C hoses and O-rings for cracks or swelling when doing any engine bay work
- Run the A/C for at least 10 minutes every month, even in winter — this circulates the compressor oil and keeps seals lubricated
Filed under
A/C Series
- Now Semi Truck A/C Not Blowing Cold: 5 Common Causes
- New Semi Truck A/C Compressor Replacement: Symptoms, Guide & Cost →
- Soon Semi Truck A/C Maintenance Checklist for Summer
- Soon Semi Truck A/C Condenser vs Compressor: What’s the Difference?