When a semi truck A/C system stops blowing cold air, the compressor is the first thing most experienced mechanics check — and for good reason. The compressor is the only moving part in the system. When it fails, the whole system stops working.
The good news is that compressor failure is usually predictable. It gives you warning signs before it completely dies, and the replacement job — while not a roadside fix — is straightforward for any mechanically capable owner-operator or fleet shop.
This guide covers everything: how to tell if the compressor is your problem, whether you need to replace the whole unit or just the clutch, what else to replace at the same time (this part matters a lot), and what the job will cost you in Canada.

The A/C compressor is belt-driven off the engine crankshaft. The electromagnetic clutch at the front engages only when A/C is switched on — clutch failure is one of the most common causes of a non-cooling system.
What the A/C Compressor Does
The compressor is the pump of the A/C system. Its job is to take low-pressure refrigerant gas from the evaporator and compress it into a high-pressure, high-temperature gas. That hot gas then moves to the condenser at the front of the truck, dumps its heat to outside air, becomes a liquid, and flows to the evaporator inside the cab — where it expands and absorbs heat from cabin air, producing the cold air you feel.
Without a working compressor, there is no pressure difference in the system. No pressure difference = no refrigerant flow = no cooling, regardless of how much refrigerant is in the lines.
The compressor has two main sub-components that fail independently:
- The clutch assembly — an electromagnetic plate that engages the compressor to the drive belt only when A/C is switched on. The clutch can fail without the compressor itself being damaged.
- The compressor body — contains pistons or a scroll mechanism that does the actual compression. This is where internal mechanical failure happens (seized pistons, broken valve plates, worn shaft seal).
This distinction matters for diagnosis and for deciding what to replace.
7 Symptoms of a Failing A/C Compressor
A compressor rarely dies without warning. Here are the symptoms in rough order from early-stage to full failure:
| Symptom | What It Indicates | Stage |
|---|---|---|
| A/C starts cold then gradually warms up | Compressor losing efficiency; also consistent with a failing dryer | Early |
| Clutch not engaging when A/C is switched on | Clutch coil failure, low refrigerant triggering low-pressure cutout, or bad pressure switch | Early–Mid |
| Clicking noise from compressor area at startup | Clutch slipping or marginal engagement; worn clutch gap | Early–Mid |
| Squealing belt when A/C is on | Compressor beginning to seize, creating drag on the belt | Mid |
| Grinding or rattling from compressor | Internal bearing failure or pistons breaking down — replace immediately | Mid–Late |
| Oil stain around compressor shaft | Shaft seal leaking refrigerant oil; refrigerant is also escaping | Mid–Late |
| Warm air only, no cold at all | Complete compressor or clutch failure; also check refrigerant level first | Late |
Most important first step: Before replacing a compressor, verify refrigerant level with a gauge set. A system that's simply low on refrigerant will trigger the low-pressure cutout switch and prevent the clutch from engaging — mimicking a failed compressor exactly. If refrigerant is the issue, find the leak first before adding refrigerant.
How to Diagnose the Compressor
Step 1 — Check the clutch
Start the engine and turn on the A/C. Watch the front of the compressor. You should see the center plate (the clutch disc) snap forward and engage with the spinning outer pulley — they should rotate together. If the outer pulley is spinning but the center plate is stationary, the clutch isn't engaging.
Now rule out simple causes: check the A/C fuse and relay first. If those are fine, check that refrigerant pressure is adequate (see Step 2). A low-pressure cutout switch will prevent clutch engagement below approximately 25 psi on the low side to protect the compressor from running without oil.
Step 2 — Connect a gauge set
A manifold gauge set gives you the full picture. Connect red to the high-side service port (smaller diameter, near the compressor outlet) and blue to the low-side port (larger diameter, between evaporator and compressor inlet).
With engine running, A/C on, at roughly 25°C ambient temperature:
- Low side: 25–45 psi — normal
- High side: 200–350 psi — normal
- Both sides low: low refrigerant charge (leak somewhere)
- Low side high, high side low (equalized): compressor not compressing — internal failure
- Both sides high: condenser blocked or cooling fan not working
Equalized pressures with the A/C running — where both sides read the same number (usually around 80–100 psi) — is the clearest sign of a mechanically failed compressor. The system has pressure but the compressor is not creating a pressure difference. Replace the compressor.

A manifold gauge set is the essential diagnostic tool for any A/C work. Equalized pressures on both sides while the compressor is running confirms internal compressor failure.
Clutch Only vs. Full Compressor Replacement
This is the most common question when a compressor stops engaging. The answer depends on what failed:
Replace the clutch only if:
- The outer pulley spins freely and smoothly when the A/C is off
- There is no grinding or squealing from the compressor body
- Gauge test shows the compressor was building pressure before the clutch failed
- The compressor has no visible oil leaks from the shaft seal
Replace the full compressor if:
- Gauge pressures are equalized (compressor not building pressure)
- You hear grinding, rattling, or squealing from the compressor body
- The outer pulley feels rough, catches, or shows bearing wear
- The compressor has seized — belt marks on the pulley, burning smell
- Metal debris is visible in the refrigerant oil (check receiver-dryer sight glass)
Cost comparison: A replacement clutch assembly typically costs $80–$180 CAD plus an hour of labour. A full compressor is $350–$900 plus 2–3 hours of labour. If the compressor body is mechanically sound, the clutch-only repair is worth doing. If you're unsure, lean toward the full replacement — a clutch job on a compressor that's about to seize internally is money wasted.
Need an A/C compressor for your truck?
We stock compressors for Freightliner, Kenworth, Peterbilt, Volvo, Mack and more. GTA, Canada.
What Else to Replace at the Same Time
This step is where a lot of owner-operators cut corners and pay for it later. When you replace the compressor, other components need attention — especially if the old compressor failed internally.
✅ Replacement Checklist

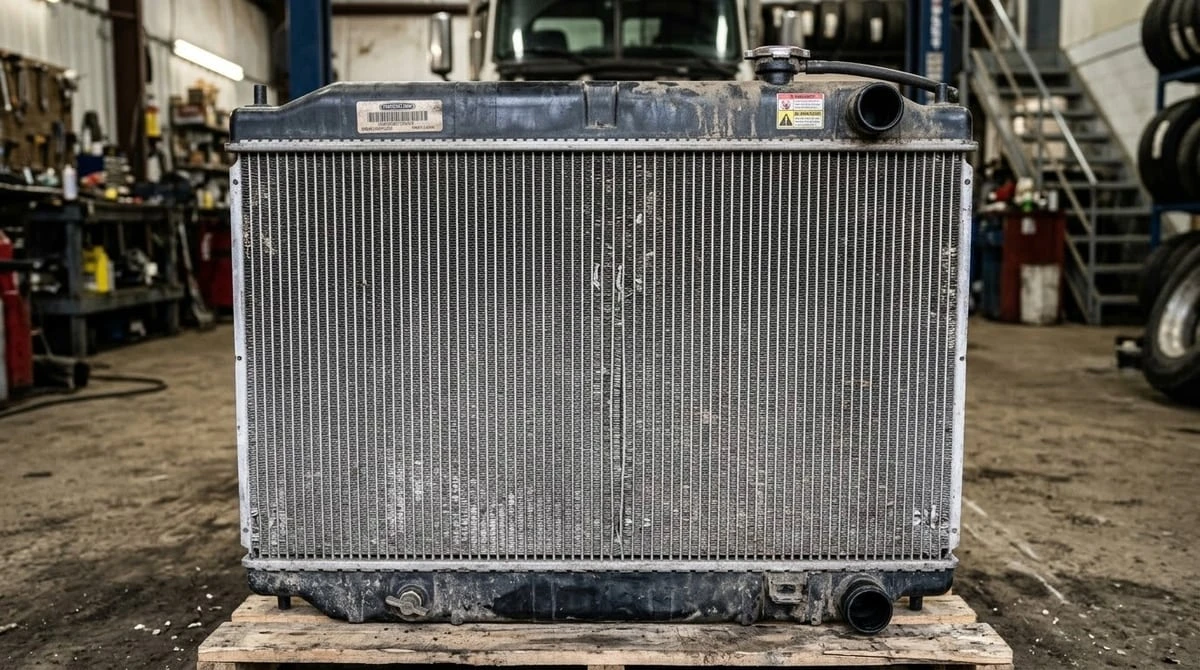
The receiver-dryer must be replaced every time the A/C system is opened. It's a consumable that absorbs moisture — once exposed to air, it saturates within hours.
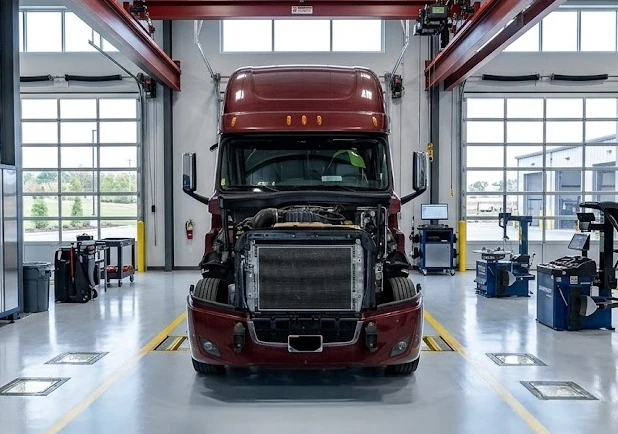
Step-by-Step Replacement Guide
This guide assumes you are replacing the full compressor. You'll need: a manifold gauge set, refrigerant recovery machine (required by law in Canada to capture old refrigerant), wrenches, O-ring kit, replacement dryer, and the new compressor.
Canadian law: Venting refrigerant to atmosphere is illegal under federal regulations (CEPA). You must use a recovery machine to capture the old refrigerant before opening any part of the A/C system. Any shop with an A/C recovery machine can do this for $40–$80.
1Recover the refrigerant. Connect the recovery machine to both service ports and recover all R-134a from the system. Confirm the system is at 0 psi before proceeding.
2Loosen the belt tensioner and remove the drive belt. On most Class 8 trucks, the A/C compressor shares the serpentine belt with the alternator and power steering pump. Photograph the belt routing before removal.
3Disconnect the A/C hoses from the compressor. Cap or plug every open fitting immediately to prevent moisture entry. Mark or photograph the hose positions — high side and low side must go back to the correct ports.
4Disconnect the clutch electrical connector. This is usually a 2-wire plug on the front of the compressor near the clutch coil.
5Remove the mounting bolts and pull the compressor. Most truck compressors are mounted with 3–4 bolts to a bracket. They're heavy — 15–25 kg depending on model. Have a second person assist or use a strap.
6Transfer the clutch if reusing it. If your new compressor doesn't include a clutch, transfer the old one. Use a clutch puller tool and a clutch installer tool — don't try to hammer it on.
7Flush lines if needed, replace receiver-dryer. If the old compressor seized internally, flush now before installing the new unit. Replace the receiver-dryer with new — this is not optional.
8Install the new compressor. Torque mounting bolts to spec. Connect hoses using new O-rings on every fitting. O-rings should be lightly coated in PAG oil before installation — never install dry.
9Reinstall the drive belt. Follow the belt routing diagram. Check tension — a loose belt will slip under compressor load.
10Pull vacuum on the system. Connect the manifold gauge set and vacuum pump. Pull the system down to at least 500 microns (29.9 in/Hg) and hold for 30 minutes minimum. This removes all air and moisture. If the vacuum doesn't hold, you have a leak — find it before charging.
11Charge with refrigerant. Add R-134a to the system spec (usually 1.5–3.5 kg depending on truck model — check the underhood sticker). Charge by weight, not by pressure alone. Verify operation: low side 25–45 psi, high side 200–350 psi, cold air from vents.
Real Cost in Canada
Here's a realistic cost breakdown for a semi truck A/C compressor replacement in Ontario and the GTA:
| Item | DIY Cost | Shop Cost (all-in) |
|---|---|---|
| A/C compressor (part) | $350–$900 CAD | Included in labour estimate |
| Receiver-dryer | $40–$100 CAD | Included |
| O-ring kit | $15–$30 CAD | Included |
| Refrigerant recovery & recharge | $80–$150 CAD (shop service) | Included |
| Labour (shop) | — | $250–$550 CAD (2–4 hrs) |
| Total estimate | $550–$1,150 CAD | $750–$1,600 CAD |
If lines need flushing or the condenser needs replacement (common after a seized compressor), add $200–$600 to either estimate. Getting the compressor right the first time — including replacing the dryer and O-rings — avoids a repeat job within the same season.
Compressor Notes by Truck Make
The replacement procedure is broadly the same across makes, but there are a few things to know:
- Freightliner (Cascadia, Columbia, Classic): Most use Sanden SD-7H15 or Denso compressors. Cascadia runs a 10S17 Denso unit on many configurations. Verify by VIN or OEM number on the original compressor.
- Kenworth (T680, T880, W900): Paccar-sourced engines often use Sanden compressors. The T680 has easy access; the W900 requires more disassembly around the cab-over tilt.
- Peterbilt (579, 389, 386): Same Paccar platform as Kenworth — compressors are often interchangeable within the same year range. The 389 has more working room than a day cab.
- Volvo (VNL 760/860): Uses a Denso or Halla compressor. The VNL series has the compressor mounted lower and forward — straightforward access.
- Mack (Anthem, Pinnacle): Often shares the same Sanden compressor as Volvo trucks (same parent company, Volvo Group). Confirm with the OEM number.
Have your part number? We'll source it fast.
Contact us with your truck make, model, year and we'll confirm the right compressor for your application.
Frequently Asked Questions
Can I drive with a seized A/C compressor?
Not safely. A seized compressor will shred or snap the drive belt, which on most Class 8 trucks also drives the alternator and power steering pump. You'll lose power steering mid-drive. Pull over immediately if you hear loud grinding or see the belt smoking.
How do I prevent compressor failure?
Most premature failures trace back to two causes: running low on refrigerant (which starves the compressor of lubricating oil) and not replacing the receiver-dryer on schedule. Replace the dryer every 3–4 years or whenever the system is opened. Check refrigerant pressure at the start of every A/C season.
Does a new compressor come with oil?
Most aftermarket compressors come pre-charged with a small amount of oil — usually 60–100 mL. You'll need to add additional PAG oil to bring the system to the correct total capacity, which varies by truck. Check the underhood spec sticker or OEM service documentation for the correct oil type and quantity.
What refrigerant do semi trucks use?
Most Class 8 trucks built after 1995 use R-134a. Some post-2020 models are beginning to transition to R-1234yf, but R-134a remains the standard across the North American fleet. Check your underhood spec label — it will specify both refrigerant type and the required system charge weight.
A/C Troubleshooting Series
1 Semi Truck A/C Not Blowing Cold: 5 Common Causes 2 A/C Compressor Replacement: Symptoms, Guide & Cost You are here